Once your free trial starts, you’ll need to connect your domain name to our hosting so visitors can access your site when they type in your domain name. This is done by updating your domain’s DNS (Domain Name System) settings.
How Domain Connection Works
Your domain name acts as a human-friendly address (e.g., www.yourbusiness.com) that points to our hosting servers. By configuring DNS settings, you tell the internet where your website is located.
Connecting Your Domain
If you’ve registered your domain using Cloudflare Registrar, your domain name will automatically use Cloudflare’s nameservers.
If you’ve registered your domain elsewhere, your domain will usually use your registrar’s nameservers (some registrars do not provide a nameserver at all). If you’ve registered your domain elsewhere we recommend using Cloudflare’s nameservers to take advantage of their free speed and security features. For more information on how to set this up, see Cloudflare’s guide here.
In this example, our domain uses Cloudflare as our nameservers. If you’re not using Cloudflare’s nameservers, the steps may differ slightly but will generally be the same:
1) Log in to your domain registrar account
This is the registrar where you’ve registered your domain name.
2) Locate your domain name
Select Domains → Overview, then click on your chosen domain name.
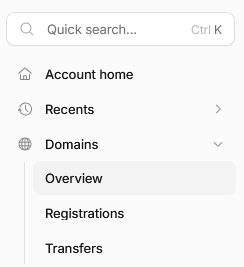
3) Locate DNS Management or Zone editor
Select DNS → Records
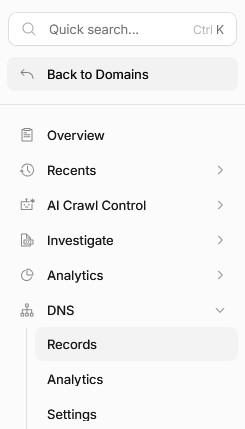
4) Update your DNS records
You should be on a screen that looks similar to this:
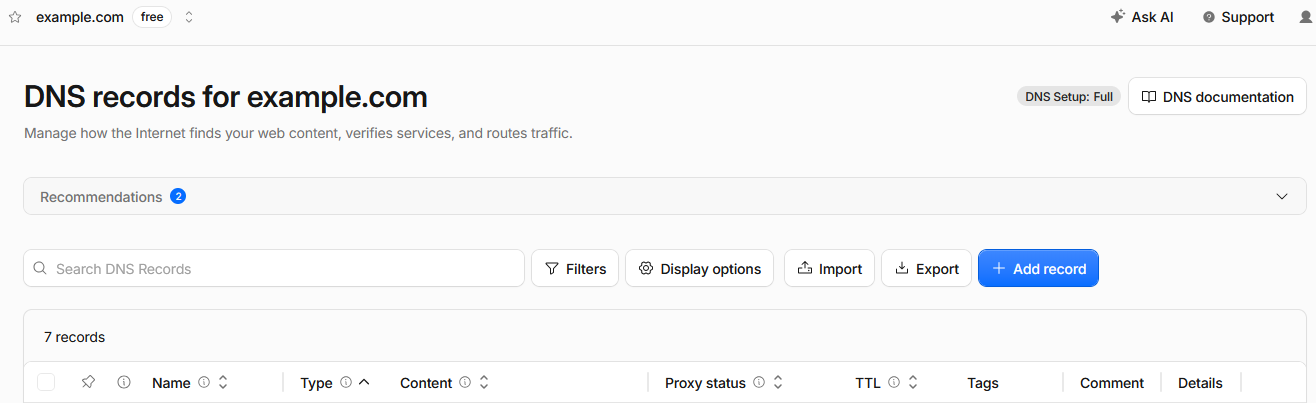
To add an A Record:
1. Click + Add Record and select ‘A’ under type:
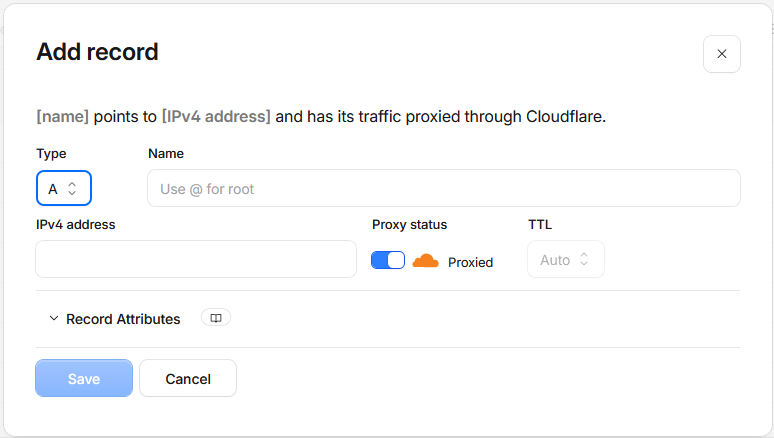
2. The name for your A record is usually '@’. We’ll give you the IP address for your web hosting server - enter this into the IPv4 address field.
3. Press Save to save your changes
To add a CNAME Record:
1. Click + Add Record and select ‘CNAME under type:
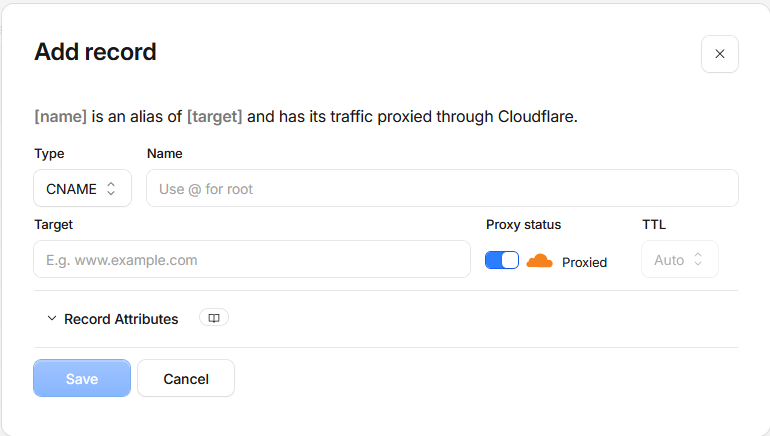
2. The name for your CNAME record is usually ‘www’. The target for your CNAME record is usually ‘@’ or your domain name. This ensures that visitors can also reach www.example.com, and not just example.com.
3. Press Save to save your changes
DNS Propagation
After making changes, it can take time for updates to spread across the internet. This is known as DNS propagation.
Typically takes a few minutes to 24 hours, but can occasionally take up to 48 hours. In case it takes longer, we can extend your trial to ensure you have a minimum of 7 days to test your website.
During this time, your website may load differently depending on location.
Best Practices
Double-check entries: Even small typos in DNS settings can prevent your site from working.
Keep a backup: Take note of your original settings before making changes.
Allow time for updates: Avoid making repeated changes while DNS is propagating.
Contact support if unsure: We’re here to help guide you through the process.